leave a copy of mails on Server – Windows Live mail

You’ll want to do this if you read e-mail in Windows Live Mail and another program (or our Webmail system). If you don’t set up Windows Live Mail to leave your messages on the server, it will delete the messages as soon as it connects to read mail, and the other program (or Webmail) won’t be able to see the messages.

You can also do this if you want your old incoming mail to be permanently stored in our backup system (see “E-mail backups” on our backup policy page for more details).

This page explains how to set up Windows Live Mail to leave a copy of each message on the server. It assumes that you have already followed the basic instructions to set up Windows Live Mail. It also assumes that you have a POP mailbox, since IMAP mailboxes do not require this sort of setting.

Changing the Windows Live Mail settings

To leave messages on the server, you will:

  • Open the Advanced settings window for your mail account
  • Check the “Leave a copy of messages on server” checkbox

1. Start Windows Live Mail.

Start the Windows Live Mail program from your Start menu.

2. Open the “Accounts” window.

In Windows Live Mail, click on Menu, Options, then Email accounts on the Toolbar.

screen shot

3. Open the account “Properties” window

Highlight your address@example.com account and click Properties.

screen shot

4. Set the advanced properties.

Click the Advanced tab, then check the Leave a copy of messages on server checkbox.

To make sure copies of every message don’t stay on the server forever (which can slow down your mail connections and use up your disk space allowance), we also recommend checking the box marked “Remove from server after X days”. Choose a number of days that’s long enough that you’ll be able to read the messages in your other mail program (or Webmail).

The “Remove from server when deleted from ‘Deleted Items'” checkbox controls whether an email that you delete from your computer will also get deleted from the server before the number of days specified above is reached. If you check the checkbox, then messages deleted from your computer will always be deleted from the server. If you do not check the checkbox, then messages deleted from your computer will not be deleted from the server until the specified number of days has passed (assuming that the “Remove from server after X days” checkbox is checked).

screen shot

5. Close the setup windows.

Click OK to close the “Properties” window, then click Close to close the “Accounts” window.

Windows Live Mail configuration is complete

You’re finished! From now on, any mail that arrives should stay on the server, and you should be able to see it in your other mail program or Webmail. (If you’re using another mail program, you’ll probably want to setup that program to leave a copy of your messages on the server, too.)

Display & Save Visitor’s Ip – PHP Code

found a blog post which tested and working very good

PHP-Hypertext Preprocessor.
PHP is a server side script language.Using php you can create a dynamic websites.
This is the first lesson and on this lesson you will learn how to get visitors ip and save it on your server.(i wil learn you how add this to your blog  or any web sites that haven’t php.)
-Display User’s informations-

<?php
$ip = $_SERVER[‘REMOTE_ADDR’];
$hostaddress = gethostbyaddr($ip);
$browser = $_SERVER[‘HTTP_USER_AGENT’];
$referred = $_SERVER[‘HTTP_REFERER’]; // a quirky spelling mistake that stuck in php

print “<strong>Display IP address:</strong><br />\n”;
print “$ip<br /><br />\n”;
print “<strong>More detailed host address:</strong><br />\n”;
print “$hostaddress<br /><br />\n”;
print “<strong>Display browser info</strong>:<br />\n”;
print “$browser<br /><br />\n”;
print “<strong>Where you came from (if you clicked on a link to get here</strong>:<br />\n”;
if ($referred == “”) {
print “Page was directly requested”;
}
else {
print “$referred”;
}
?>
-Code Descriptions-
<?php -to start php file.
$ip – give a variable  name to $_SERVER[‘REMOTE_ADDR’] (like y=mx+c).
$_SERVER[‘REMOTE_ADDR’]-this is the code that get user ip.
gethostbyaddr($ip) -to get host name.
$_SERVER[‘HTTP_USER_AGENT’]-get browser information.
$_SERVER[‘HTTP_REFERER’]-get where user come from.
//-we use this to put a comment in our php file.// for 1 line comment.
/*-this is for long comment and end with */
print”what you want to display on the page“;-we use this to display something on the page.
<br>-this is for line break .when we use this code.the text after this code will display in next line.

How i save user’s Informations ??

<?php

$myFile = “countip.mic”;

$fh = fopen($myFile, ‘a+’) or die(“can’t open file”);

$stringData =”Date:”.date(‘Y-m-d H:i:s’).”<br/>Ip:”.$_SERVER[‘REMOTE_ADDR’].”<br/>Browser:”.$_SERVER[‘HTTP_USER_AGENT’].”<br/>\n” ;

fwrite($fh, $stringData);

fclose($fh);
?>

-Code Descriptions-
$myfile=”countip.mic”; -$myfile is the variable that for “countip.mic”.
fwrite($fh,$stringData); -do that discribe on $fh variable and $stringData .(create countip.mic file and save data).
fclose($fh);-close the file that we open.
we get the date  time to countip file using .date(‘Y-m-d H:i:s).code.

Code for Display user’s information and Save(broth in one file) .


<?php
$ip = $_SERVER[‘REMOTE_ADDR’];
$hostaddress = gethostbyaddr($ip);
$browser = $_SERVER[‘HTTP_USER_AGENT’];
$referred = $_SERVER[‘HTTP_REFERER’]; // a quirky spelling mistake that stuck in php

print “<strong>Display IP address:</strong><br />\n”;
print “$ip<br /><br />\n”;
print “<strong>More detailed host address:</strong><br />\n”;
print “$hostaddress<br /><br />\n”;
print “<strong>Display browser info</strong>:<br />\n”;
print “$browser<br /><br />\n”;
print “<strong>Where you came from (if you clicked on a link to get here</strong>:<br />\n”;
if ($referred == “”) {
print “Page was directly requested”;
}
else {
print “$referred”;
}
?>
<?php

$myFile = “countip.mic”;

$fh = fopen($myFile, ‘a+’) or die(“can’t open file”);

$stringData =Date:”.date(‘Y-m-d H:i:s’).”<br/>Ip:”.$_SERVER[‘REMOTE_ADDR’].”<br/>Browser:”.$_SERVER[‘HTTP_USER_AGENT’].”<br/>\n” ;

fwrite($fh, $stringData);

fclose($fh);
?>


How I put this code to my website ??
First i will learn you how to add this code to your hosting that php working.

When you add this php codes to your blog or web site you must have another hosting that  php working.Many hosting providers give free php working accounts.
First you must get a free hosting account.
(click here to google search about free accounts.then select one and Register on it(eg:www.000webhost.com )).

1.Create file on your desktop with .php extension (eg:countip.php)  .
2.Copy the code and paste it on your file.
3.Save it and Upload it(your file) to you hosting account.
To download php zip file click here.(extract zip fle and upload it)
(To Upload Your file to your hosting account  .you can use Filezilla software).
Then go to your file (after you upload it) using a browser.You can see your informations on your page.
Click here to see preview. And click here to see the save file on the server.


Coutesy: http://webdevelopstepbystep.blogspot.com/2011/08/display-save-visitors-ip-php-code-1.html

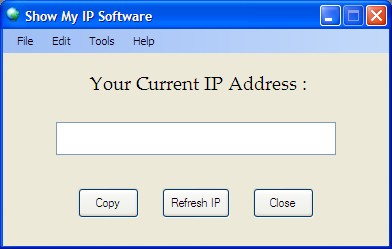
php script to show visitors IP


Create a .php file


# vi  showip.php


<h1>My Ip Address</h1><hr> <br><br> Your Ip Address is: <strong><?php echo $_SERVER[‘REMOTE_ADDR’]; ?></strong><br><br>


Close the file and  done

RESULT

http://admin2.mweb.com.na/showip.php


Global WordPress DDOS Attack – April 2013

I have got this report from My UK Service provider and it was hard , This seems to be like a Cyber War and it is not affecting a geographical area , it affects  a portion of people on all parts of the world.

On Thursday 11th April we noticed an abnormal amount of bot traffic hitting our servers, all specifically targeting wp-login.php files in an attempt to gain access to the admin areas of WordPress based websites.

Normally these types of attacks are quite small scale and are easily dealt with. However it soon became clear that this attack was on a much larger scale to anything we had seen before, the attacks were coming in from over 100,000 unique IP addresses from compromised workstations across the globe at the rate of hundreds of requests per second.

The attacks continued into Friday and it became clear that the attacks weren’t isolated to one or two web hosts, it was an attack on a truly global scale that hit every web host hard.

Our initial attempts to deal with the attack and keep servers online was to attempt to block the offending IP’s, but with the scale of the attack and the amount of IP’s that needed to be blocked this proved to be an unworkable solution and caused more problems than it fixed.

The only option left to us on Friday was to globally disable access to all wp-login.php files on all of our Shared and Reseller servers in an attempt to keep servers online through the attack period. We left this block in place throughout the weekend and we are pleased to report that the action had the desired result, in that no servers were brought down by the DDOS.

At the time of writing (Monday April 15th) the global DDOS appears to have dissipated.


How Do I Parse HTML Pages As PHP?

You can tell apache to treat your .html pages as .php pages by adding the following line of code to your .htaccess file:

AddHandler application/x-httpd-php5 .php .htm .html 

The above code will parse your .html pages using php5, if you would like to use php4 instead, please use the line of code below:

AddHandler application/x-httpd-php4 .php .htm .html 

WP Twitter Auto Publish Powered By : XYZScripts.com