Max OSX Server 5.2 Postfix missing SMTP Logs

Solution 1:

Apple have a new log system in Sierra. It is not using the log files or asl.

The logs are in memory or a log db.


log — Access system wide log messages created by os_log, os_trace and other logging systems.


You can read the smtpd log from terminal with this command.

log show –start “2016-10-16”  –end “2016-10-17” –predicate  ‘process == “smtpd”‘ –debug


Solution 2:

It seems that after an upgrade or a new install the log level of smtp is at such a high level, it does not report anything unless there is a serious error with the smtp server.

Try these commands to get smtp logging going again, worked for me with a couple of servers who did not seem to have any smtp logging enabled, but mail worked and outgoing as well:


sudo serveradmin settings mail:postfix:log_level = “debug”

sudo serveradmin settings mail:postfix:mail_events_log_level = “debug”


Courtesy : https://discussions.apple.com


MAC OSX Mail Server – Postfix mail queue

The PostFix mail server, part of OSX Server, is a wonderfully flexible and configurable mail transfer agent. There are many ways that your Postfix message queues can become flooded with illegitimate messages.

Postfix on OSX Server can display the mail queue in terminal.

To see mail queue, enter:
# mailq

How to Delete One Email In Any Queue

postsuper -d MESSAGE_ID

How to Delete Email for a Single User In All Queues

Use the following command to delete the messages from your mail queues. Be sure to substitute ‘youruser@yourdomain\.com’ with the email account which is flooded. Be sure to escape the dot as shown in the example:

postqueue -p | tail -n +2 | awk 'BEGIN { RS = "" } / youruser@yourdomain\.com/ { print $1 }' | tr -d '*!' | postsuper -d -

If you mail server is really clogged, this can take hours to execute.

How to Delete All Email or Just In Specific Queues

To delete all deferred messages from a single queue:

postsuper -d ALL deferred

To remove all mail from the queue, enter:

# postsuper -d ALL


Enable SSH (Secure Shell) in Elementary Luna / Ubuntu

installl ssh

To get started, press Ctrl – Alt – T on your keyboard to open Terminal. or open your  gnome-Terminal  (If installed)

When it opens, run the commands below to install SSH Server.


sudo apt-get install openssh-server

That's it! , if you need to change default port and stuff , edit the below file

sudo vi /etc/ssh/sshd_config

or

sudo gedit /etc/ssh/sshd_config

For a simple and quick SSH client, click here to download Putty.

Pure-FTP / How to Create User or reset Password

Pure-FTP is one of the stable , Secure  FTP server , Very easy to install from source or using YUM in CentOS,  or In Case of Ubuntu just run “sudo Apt-get install pure-ftpd-common pure-ftpd.


After Installation, I have noticed it has a Database of it’s own for handling users and a bunch of nice commands to manage them. here it goes


 Create New FTP User

Open the terminal and run this command:

ajay~# pure-pw useradd ajay -u ftpusers  -g ftpusers -d /var/www/html/ajay

Users are stored by default in this location: /etc/pure-ftpd/pureftpd.passwd , Here -u ftpusers and -g ftpusers represent the corresponding Linux user, This will help you for the permissions and stuff later.

After creating a user, you have to update this database with this command:

ajay~# pure-pw mkdb

If you want to get information about a specific FTP user, use this command:

ajay~# pure-pw show ajay

To list all FTP users,

run this command:

ajay~#  pure-pw list

Reset FTP User Password

If you a user password is forgotten, you can reset it with the following command:

ajay~#  pure-pw passwd ajay

Dont forget to update  your database with this command:

ajay~# pure-pw mkdb


Cool , now feel bit more powerful. have a great time ahead

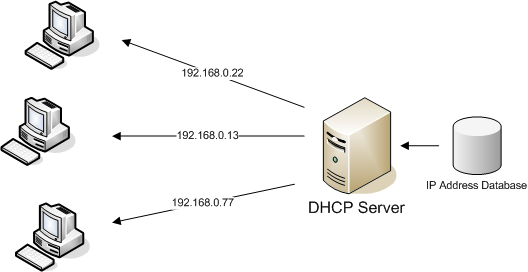
dhcp server configuration in centos

Install DHCP Server

Normally it install as part of your OS, if not you can install via YUM

#  yum -y install dhcp

Copy the sample conf file to /etc folder

# cp -f /usr/share/doc/dhcp*/dhcpd.conf.sample /etc/dhcpd.conf

Open Conf file

# vim  /etc/dhcpd.conf

My conf file looks like this

root@ajay:~# cat /etc/dhcpd.conf
authoritative;
#
default-lease-time 21600;
max-lease-time 43200;
#
# Dynamic DNS Options
#
# At least for this version, we won’t be including dynamic DNS updates.
#
ddns-update-style interim;
#ignore client-updates;
#
#key DHCP_UPDATER {
# algorithm HMAC-MD5.SIG-ALG.REG.INT;
# secret QXJjaGl0ZWN0IHZzIE9yYWNsZQo=;
#};
##
#zone __CLIENT__.private. {
# primary 127.0.0.1;
# key DHCP_UPDATER;
#}
##
#zone 0.168.192.in-addr.arpa. {
# primary 127.0.0.1;
# key DHCP_UPDATER;
#}
#
# Subnets
#
# Main connection (internal network).
#
subnet 192.168.0.0 netmask 255.255.255.0 {
#
# We retain the range 192.168.0.1–19 for static addresses,
# such as printers, and 192.168.0.20–49 for PPTP clients.
#
range dynamic-bootp 192.168.0.10 192.168.0.60;
option subnet-mask 255.255.255.0;
option broadcast-address 192.168.0.255;
option routers 192.168.0.1;
option domain-name “Ajay.private”;
option domain-name-servers 192.168.0.1;
#host abc {
# hardware ethernet 12:34:56:78:AB:CD;
# fixed-address 192.168.0.2;
#}
}

After that enable dhcpd in all run levels

# chkconfig dhcpd on

# /etc/init.d/dhcpd start

whala! check your client machine to see if it gets dhcp address

WP Twitter Auto Publish Powered By : XYZScripts.com