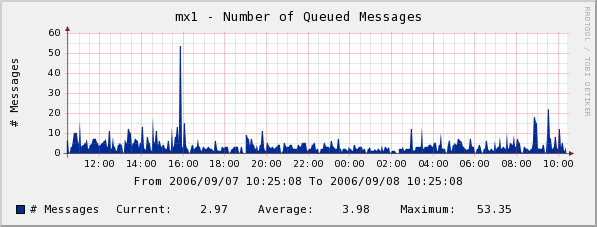
Cacti is a complete frontend to RRDTool, it stores all of the necessary information to create graphs and populate them with data in a MySQL database. The frontend is completely PHP driven. Along with being able to maintain Graphs, Data Sources, and Round Robin Archives in a database, cacti handles the data gathering. There is also SNMP support for those used to creating traffic graphs with MRTG.
Required software(s)
You need to install the following software on RHEL / Fedora / CentOS Linux:
- MySQL Server : Store cacti data.
- NET-SNMP server – SNMP (Simple Network Management Protocol) is a protocol used for network management.
- PHP with net-snmp module – Access SNMP data using PHP.
- Apache / lighttpd / ngnix webserver : Web server to display graphs created with PHP and RRDTOOL.
Install the software
First, login as root user and type the following command to install mysql, apache and php:
# yum install mysql-server mysql php-mysql php-pear php-common php-gd php-devel php php-mbstring php-cli php-snmp php-pear-Net-SMTP php-mysql httpd
Configure MySQL server
First, set root password:
# mysqladmin -u root password NEWPASSWORD
Create cacti MySQL database
Create a database called cacti, enter:
# mysql -u root -p -e 'create database cacti'
Create a user called cacti with a password called zYn95ph43zYtq, enter:
# mysql -u root -p
mysql> GRANT ALL ON cacti.* TO cacti@localhost IDENTIFIED BY 'zYn95ph43zYtq';
mysql> FLUSH privileges;
mysql> \q
Install snmpd
Type the following command to install net-snmpd
# yum install net-snmp-utils php-snmp net-snmp-libs
Configure snmpd, open /etc/snmp/snmpd.conf
# vi /etc/snmp/snmpd.conf
Append / modify it as follows (see snmpd.conf man page for details):
com2sec local     localhost           public
group MyRWGroup v1         local
group MyRWGroup v2c        local
group MyRWGroup usm        local
view all    included  .1                               80
access MyRWGroup ""      any       noauth    exact  all    all    none
syslocation Unknown (edit /etc/snmp/snmpd.conf)
syscontact Root <root@localhost> (configure /etc/snmp/snmp.local.conf)
pass .1.3.6.1.4.1.4413.4.1 /usr/bin/ucd5820stat
Save and close the file. Turn on snmpd service:
# /etc/init.d/snmpd start

# chkconfig snmpd on
Make sure you are getting information from snmpd:
# snmpwalk -v 1 -c public localhost IP-MIB::ipAdEntIfIndex
Sample ouptut:
IP-MIB::ipAdEntIfIndex.10.10.29.68 = INTEGER: 2
IP-MIB::ipAdEntIfIndex.67.yy.zz.eee = INTEGER: 3
IP-MIB::ipAdEntIfIndex.127.0.0.1 = INTEGER: 1
Install cacti
First, make sure EPEL repo is enabled. Type the following command to install cacti:
# yum install cacti
Install cacti tables
Type the following command to find out cacti.sql path:
# rpm -ql cacti | grep cacti.sql
Sample output:
/usr/share/doc/cacti-0.8.7d/cacti.sql
Type the following command to install cacti tables (you need to type the cacti user password):
# mysql -u cacti -p cacti < /usr/share/doc/cacti-0.8.7d/cacti.sql
Configure cacti
Open /etc/cacti/db.php file, enter:
# vi /etc/cacti/db.php
Make changes as follows:
/* make sure these values refect your actual database/host/user/password */
$database_type = "mysql";
$database_default = "cacti";
$database_hostname = "localhost";
$database_username = "cacti";
$database_password = "zYn95ph43zYtq";
$database_port = "3306";
Save and close the file.
Configure httpd
Open /etc/httpd/conf.d/cacti.conf file, enter:
# vi /etc/httpd/conf.d/cacti.conf
You need to update allow from line. Either set to ALL or your LAN subnet to allow access to cacti:
#
# Cacti: An rrd based graphing tool
#
Alias /cacti    /usr/share/cacti

<Directory /usr/share/cacti/>
        Order Deny,Allow
        Deny from all
        Allow from 10.0.0.0/8
</Directory>
Another option is create /usr/share/cacti/.htaccess file and password protect the directory. Finally, restart httpd:
# service httpd restart
Setup cacti cronjob
Open /etc/cron.d/cacti file, enter:
# vi /etc/cron.d/cacti
Uncomment the line:
*/5 * * * * cacti /usr/bin/php /usr/share/cacti/poller.php > /dev/null 2>&1
Save and close the file.
Run cacti installer
Now cacti is ready to install. Fire a webbrowser and type the url:
http://your.example.com/cacti/
OR
http://your.server.ip.address/cacti/
Just follow on screen instructions. The default username and password for cacti is admin / admin. Upon first login, you will be force to change the default password.
How do I configure SNMP data collection?
SNMP can be used to monitor server traffic. Once installed login to cacti.
=> Click on Devices
=> Select Localhost
=> Make sure SNMP options are selected as follows:

Fig.01: SNMP configuration
Finally, click on Save button.
How do I create SNMP graphs?
Click on “Create Graphs for this Host” link on top right side.
Select SNMP – Interface Statistics
Select a graph type (such as In/Out bytes with total bandwidth)
Finally, click on Create button.
How do I view graphs?
To view graphs click on Graphs tab. Here is sample graph from one my own box:

Fig.02: Cacti in Action – Memory, CPU and Network Usage
Courtesy: www.cyberciti.biz/faq/fedora-rhel-install-cacti-monitoring-rrd-software/


